
How Shopify Shop Metafield Objects can be Used to Show Information about your Brick and Mortar Stores

What are Shopify Shop Metaobjects?
Shop-level metaobjects in Shopify are like reusable, customizable content blocks you create once and use anywhere across your store. Think size charts, brand or designer bios, FAQs, ingredient or care details, store hours, promo banners, or “about the maker” highlights—all managed in one place, then attached to products, collections, and pages as needed.
Because they live at the shop level (not tied to any single product), you can update them once and see changes everywhere, keeping your store consistent and saving time. You’ll find and manage them in your Shopify admin under Settings > Metafields & Metaobjects, so you don’t need a custom app or heavy coding—just set up the content you want, and plug it into your theme wherever it makes sense.
In this article we're going to talk about creating a Shop level Shopify Metaobject to use to display information about the physical locations for XYZ Corporation.
Prerequisites:
Access to a Shopify Store or Shopify Development Store
Some Working Knowledge of the Shopify Admin
Some Working Knowledge of Shopify's Liquid Templating Engine
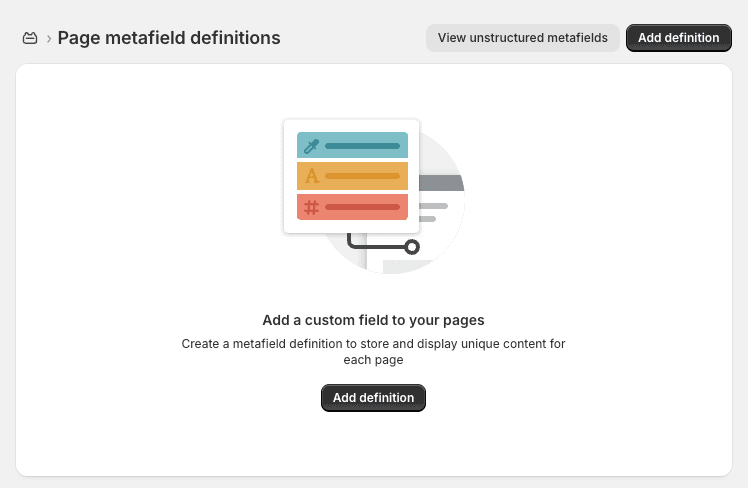
Create Metaobject Definitions
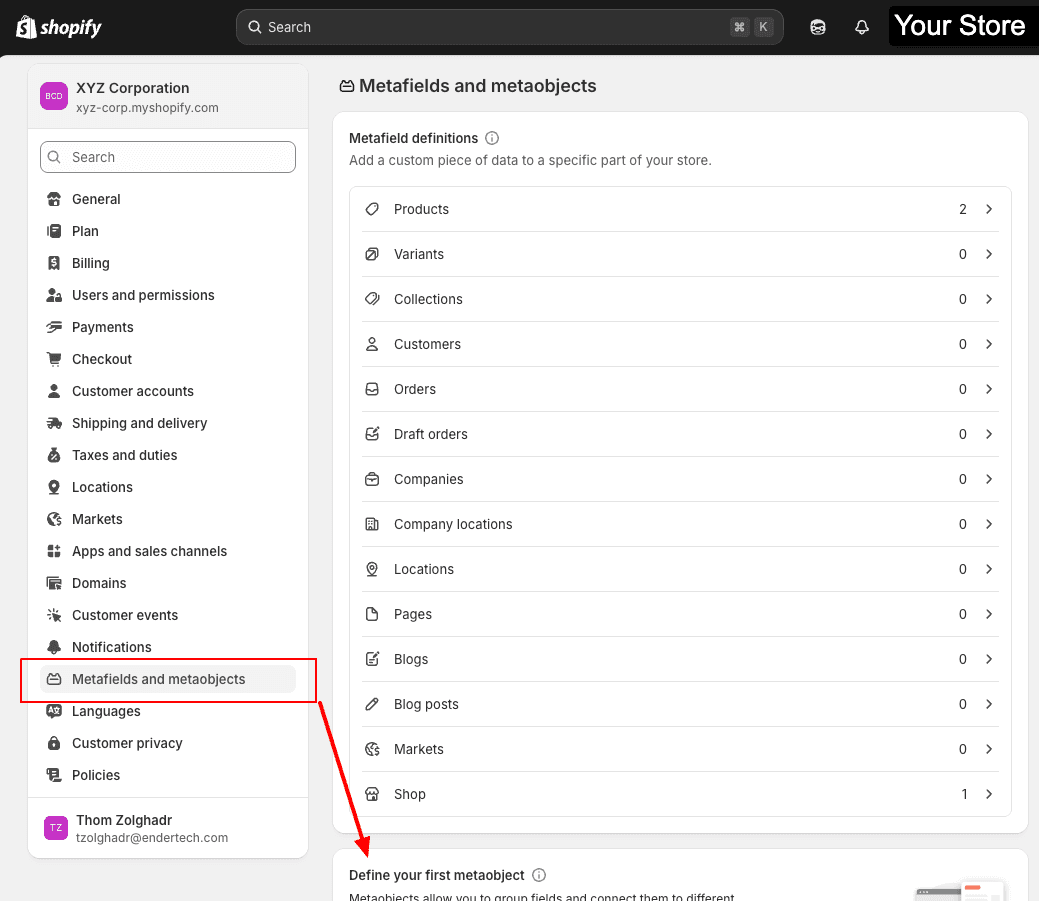
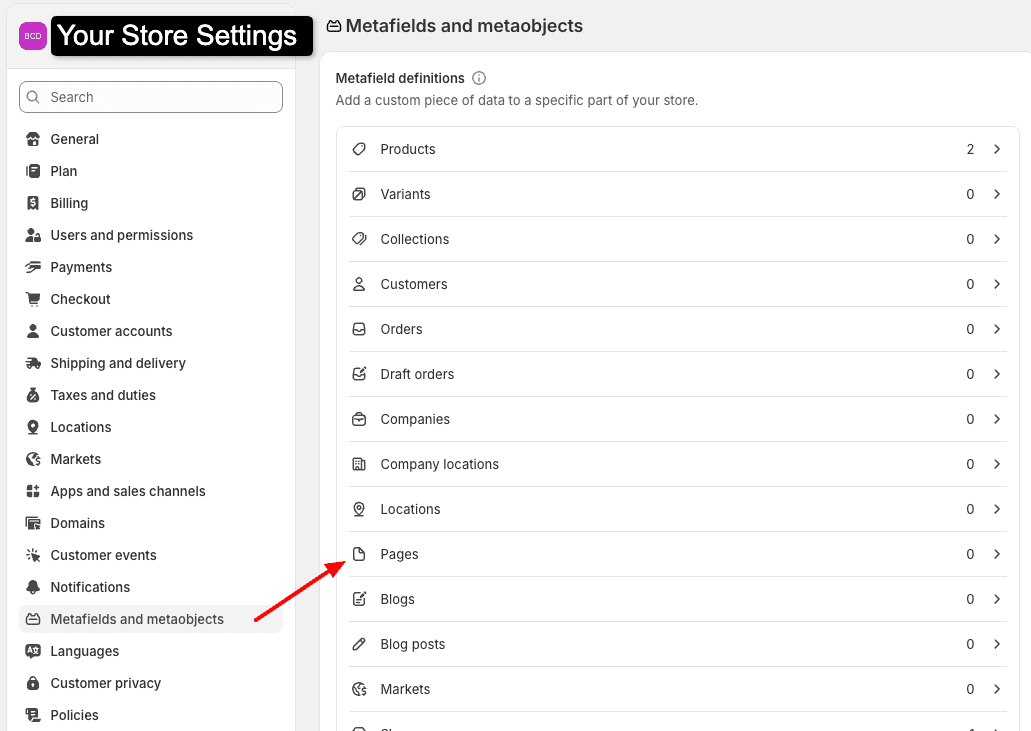
Navigate to the Settings of your Shopify store and select "Metafields and Metaobjects" as shown above. If you have not added and Shop Metaobjects to your Shopify store, then you should see something like this at the bottom of the page. That is excellent! Today you will be learning how to use them!
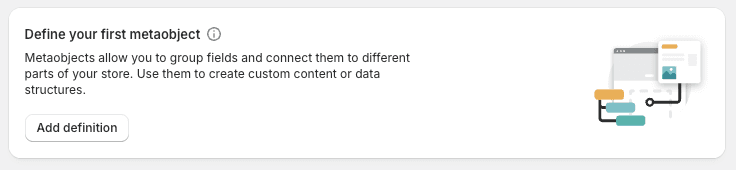
Select "Add Definition" and you should be taken to an "Add Metaobject Definition" form. You can read more about what all these options are here.
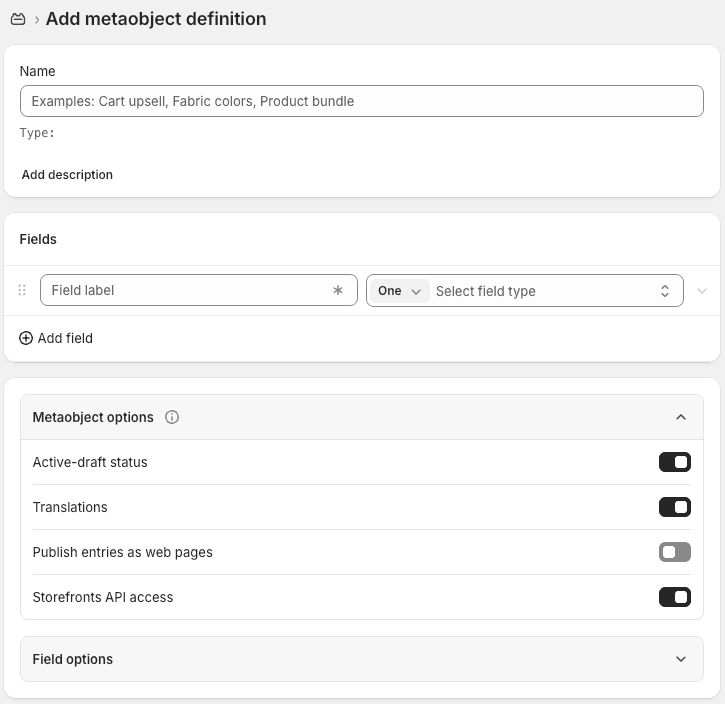
Since we're trying to create location information, we're going to create some fields that relate to our physical store locations that might be relevant both to our customers as well as our internal usage.
Location Name *Required
How do your customers refer to this location? I.e. "Townsville Location"
Location Identifier *Required
What is your internal identifier for this location?
Single Line Text
Location Phone Number
Single Line Text
Location Address Line 1
Single Line Text
Location Address Line 2
Single Line Text
Location Hours Monday - Saturday
Single Line Text
Location Hours Sunday
Single Line Text
Let's create these definitions and make sure that the Active-draft status is "Enabled" to make it active. We also want to make sure that the Storefronts API Access is enabled. This will ensure we can use this data in our liquid templates.
Make sure your page looks something like the image below, and click "Save."
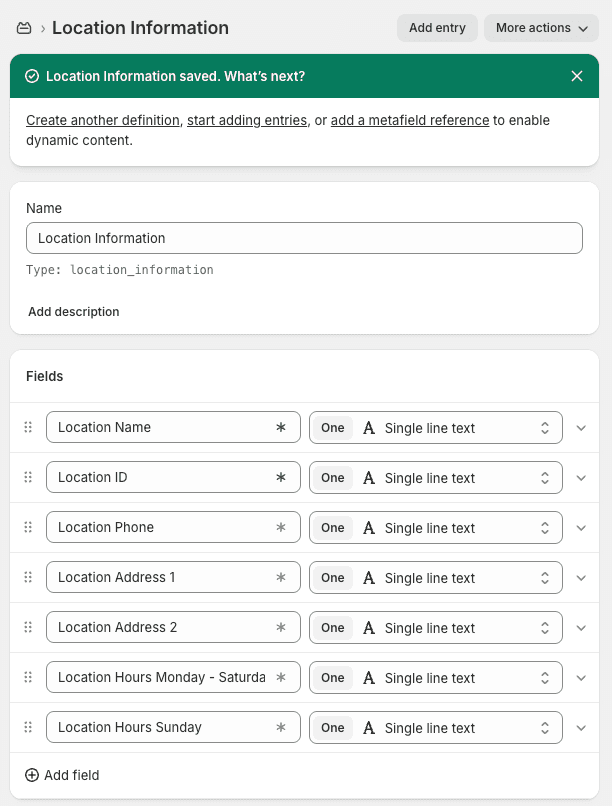
Super! Now lets get these metaobjects populated!
Populate Metaobjects
After saving you'll likely see something like this image at the top of your screen.
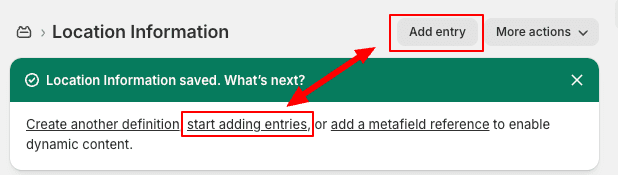
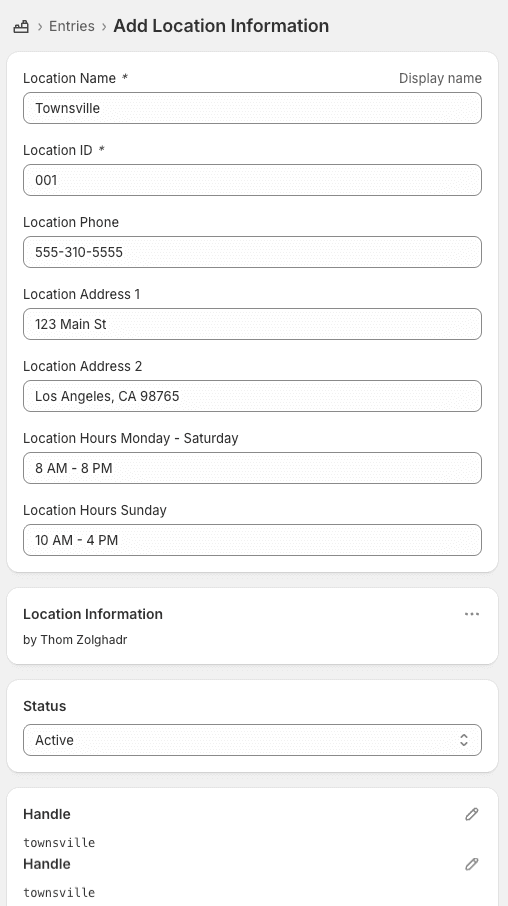
Click "Add Entry." And we should see the following form with empty fields. Feel free to create a few of your own matching what I did! I created two for the purpose of this article:

Now if we go to our Content > Metaobjects menu, we can see the Metaobject we created, and how many entries it has.

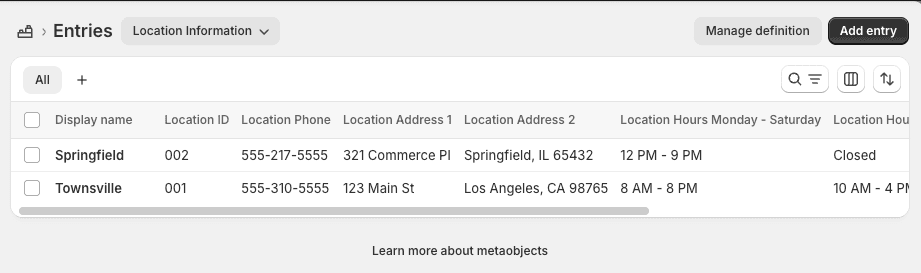
Clicking on the metaobject "Location Information" will take us to a listing of all the entries we have created so far:
Now let us put these metaobjects to use!
Create Page Reference Metafield
Now we want to reference this metaobject somewhere else in our store.
Since we're going to create a page that references this metaobject information, we need to set up a metafield on pages. Navigate back to Settings > Metafields and Metaobjects and select Pages
From there click on "Add Definition"
And fill out the form as follows:
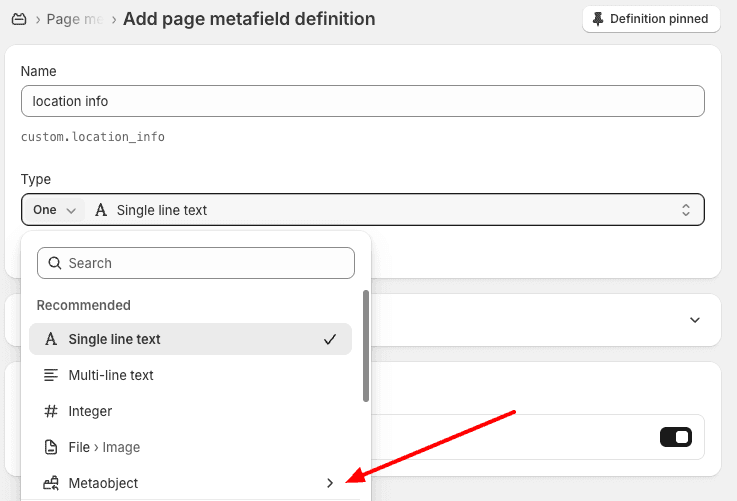
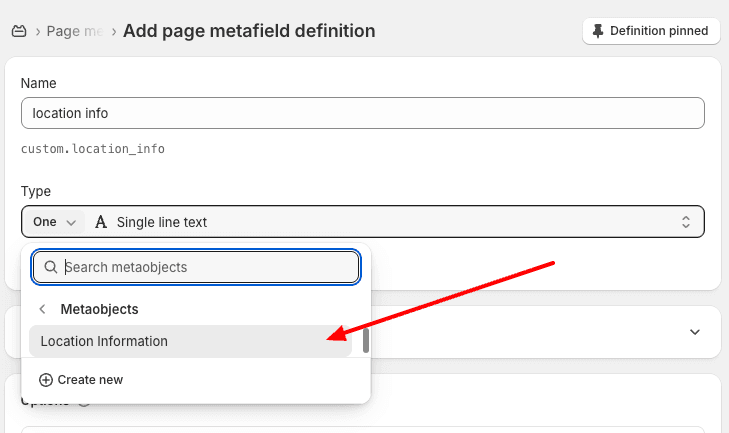
Make sure Storefront API access is enabled and click "Save."
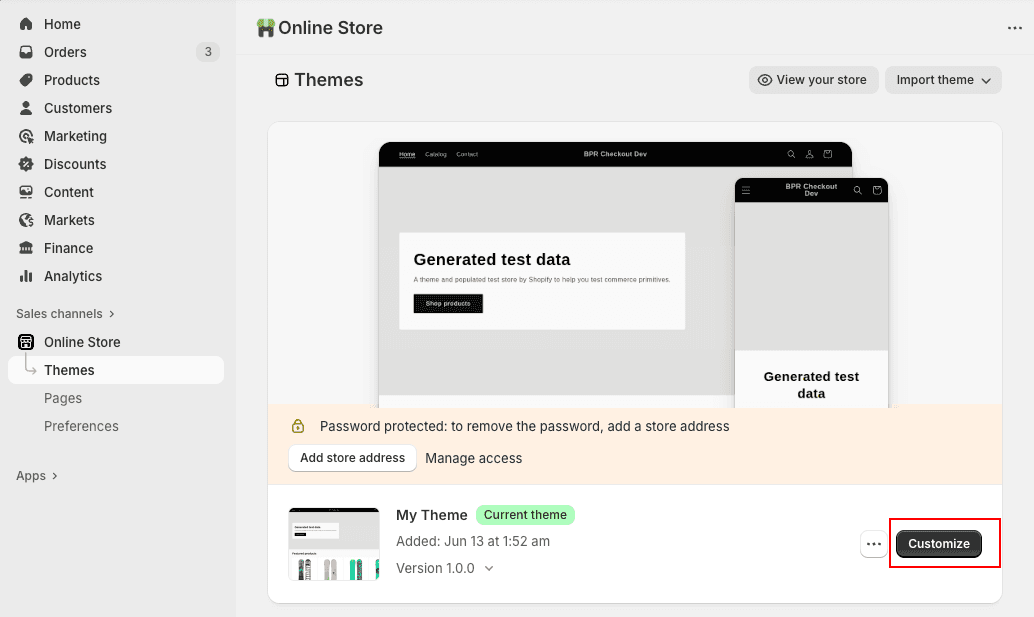
Create Location Template
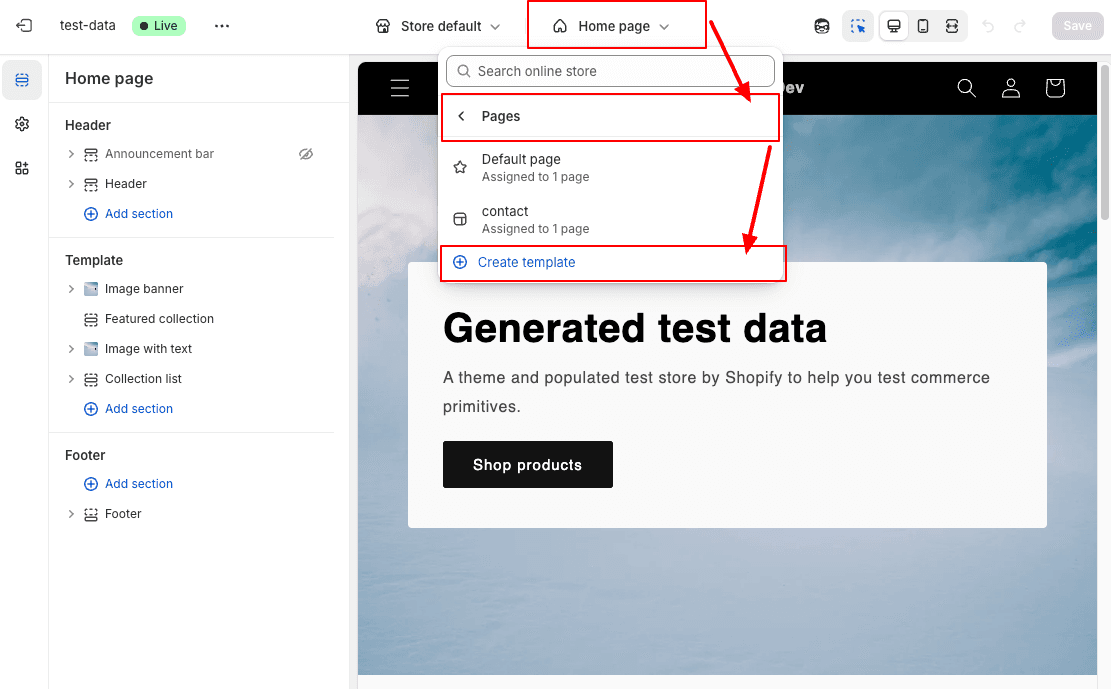
Lets now create the Page template that our Townsville page will utilize. Go to your Sales Channels and by your theme select "Customize"
Once in the customizer, create a new page template by opening the context menu (Click "Home Page"), then select "Page," and finally "Create Template."
This will open a dialog box that you will fill in as you see below:
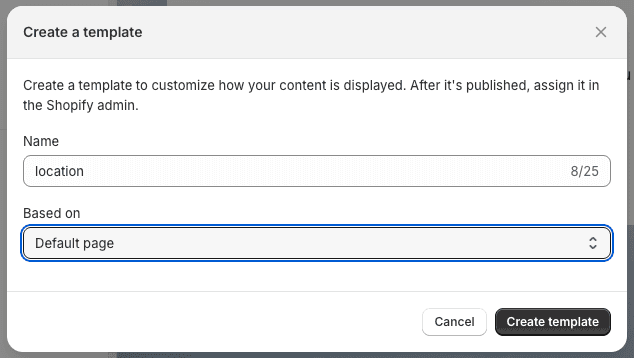
Let's call the template "location" and save it.
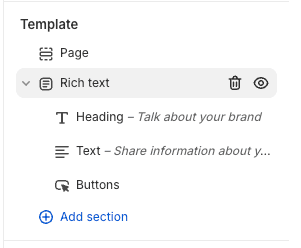
Now in the left column, we want to add a Rich Text section. This will allow use to set up the use of the metafields from the metaobject we created:
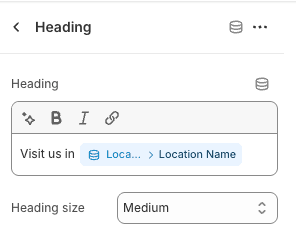
Lets edit the heading. Here we'll add the name of our location. Fill in "Visit us in " and click on the database icon. You see here in the image below, this icon shows the tooltip "Connect Dynamic Source" when hovered.
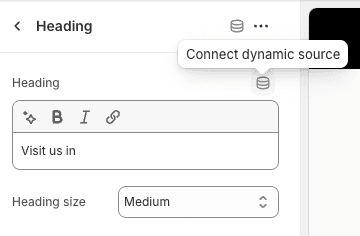
With that menu open, select Location Info > Location Name. You'll see that the Dynamic Source has been added to the Heading. Save the changes.
Great! Now before we get too deep in this template, lets create a location page to utilize this template. This will be helpful for us when go back and update the template.
Create Location Page
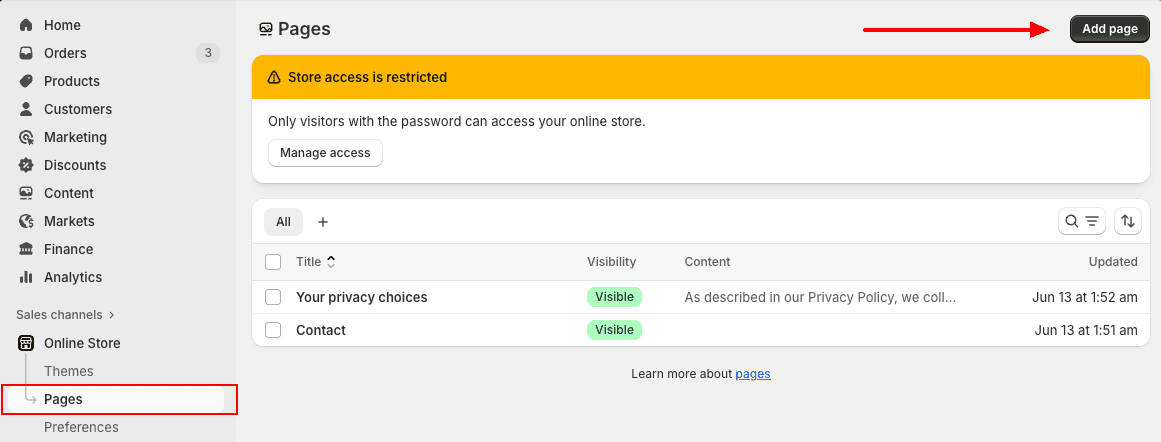
Now that we have that Page metafield created, navigate to Online Store > Pages in the left navigation menu and then click "Add Page" on the top right to add a new page.
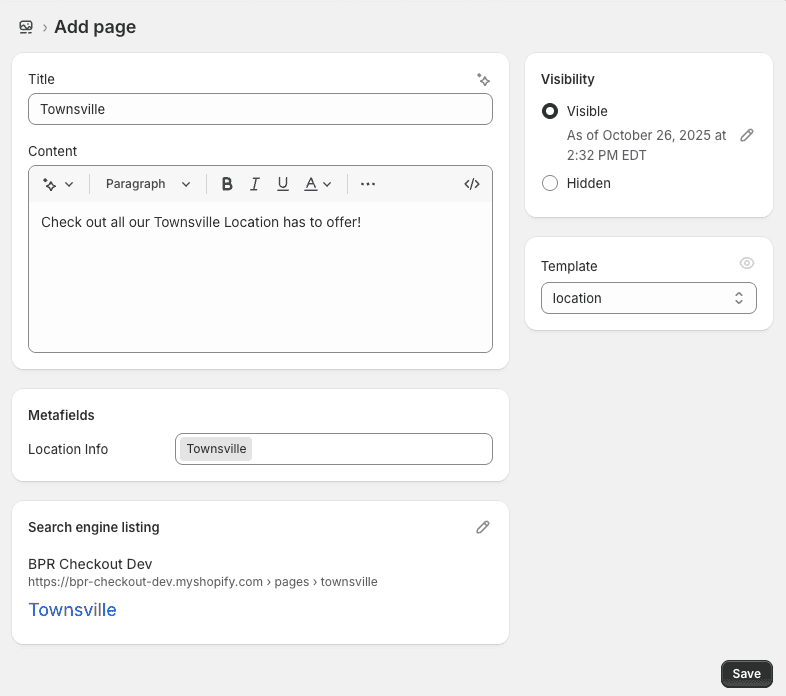
Create your new page as you see in the image below. The important thing is that we're going to want to add the Location Info metaobject to this page.
We will add the metaobject by clicking on the metafields input, selecting "Select Entry," and selecting the Townsville entry.
On the right, select the "location" template that we created in the previous step. It should look something like the image below. Don't forget to save!
Excellent! Now you have created a Townsville Page that uses the Location template.
Feel free to duplicate the process here with the Springfield location, making sure you assign the Springfield entry (or whatever entry you created). In the next step we're gonna go back and update the template to include the rest of the location info.
Update Template
Back in the customizer, navigate back to the location page template (Home Page > Page > location in the menu on top).
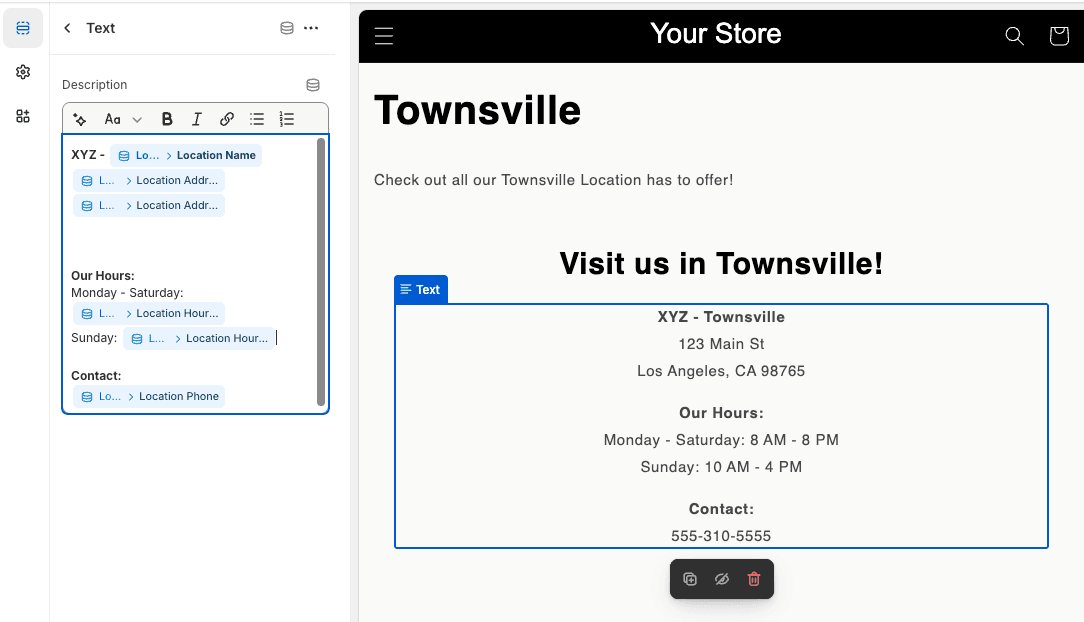
Now you should see the preview window shows the contents of our Page from the last step, as well as that heading we created in Step 4, with the Dynamic Source populated for Townsville!

Let's now edit the Text element of the Rich Text section we created. Navigate on the left side to the Text element and fill the various elements.
Here I filled it out using
XYZ - [Dynamic Source location_info > Location Name] [Dynamic Source location_info > Address Line 1] [Dynamic Source location_info > Address Line 2]
Our Hours: [Dynamic Source location_info > Location Hours Monday - Saturday] [Dynamic Source location_info > Location Hours Sunday]
Contact: [Dynamic Source location_info > Phone]
See the results below:
Save the template to make sure your changes persist!
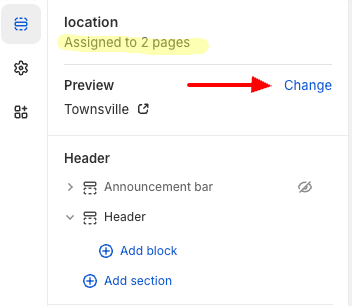
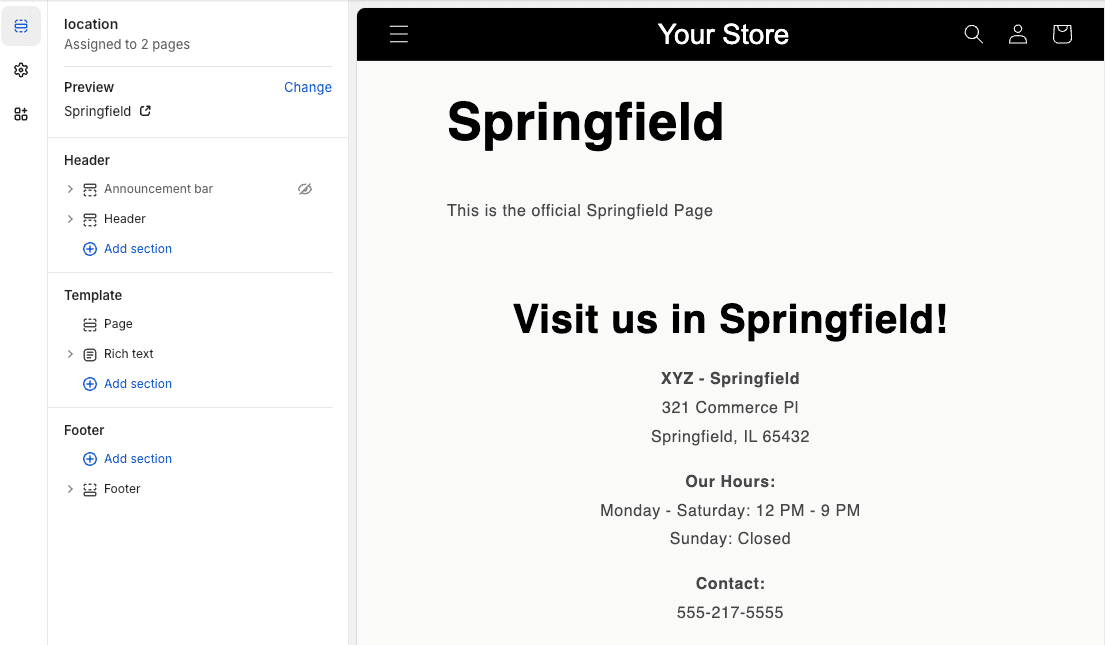
If you created another location page for Springfield (or any other of your own) in the previous step, you can see that data dynamically sourced as well! In this case, I have two pages, Townsville and Springfield. You can see that I have 2 pages assigned to this template, and I can change the preview. When I created Springfield, I used different information to fill out the address, phone, and hours. Lets see that reflected in the preview! (If you have not created another page to use the location template, do that first)
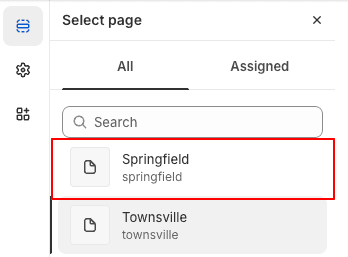
Back on the top level of the template editor, we see Assigned to 2 pages and a Preview section with the button "Change." Click that and see that we can select from other pages to preview this template on.
I'm going to select "Springfield" so I can preview that page with it's selected location info entry.
Now you'll see that the Springfield store information is reflected on our Springfield page, using the same template!
Now What?
What was the point of all of this? Couldn't I have just created pages and updated the location info in each spot and been done with it?
Absolutely, but the beauty of Metaobjects is in their reusability! Now that we have set up this data, any time we want to update it, we can update the metaobjects themselves. Consider the following:
You want to be able to display to a customer what physical locations have the current product in stock on a Product Details Page. When showing this you also want to be able to list the name, address, and hours of each store. Imagine the work of having to update the Product Details Page, the Location page, and wherever else you added that info! The logic can be programmed once, and then if a store changes its hours, you only have to update the metaobject!
Additionally, these values can be used in logic to determine values, make comparisons, etc. That's not something you get when you simply put the text on the page! Let's say in the above example you wanted to exclude a specific location, or change how the name is displayed, or some other custom logic? That would not be possible with a static text page or what we call "hard coded strings."
Here is an example of how you can iterate over your metaobject entries in liquid templating and get the values for each. The example output would create two divs, one for Townsville, and one for Springfield, each with their own location information contained inside.
{% assign locations = shop.metaobjects.location_information.values %}
<div class="locations-simple">
  <h3>Locations:</h3>

  {% for location in locations %}
    <div class="location">
      <h4>{{ location.handle }}</h4>
      <p><strong>Name:</strong> {{ location.metafields.custom.location_name.value | default: "No name" }}</p>
      <p><strong>ID:</strong> {{ location.metafields.custom.location_id.value | default: "No name" }}</p>
      <p><strong>Address:</strong> {{ location.metafields.custom.location_address_1.value | default: "" }} {{ location.metafields.custom.location_address_2.value | default: "No address" }}</p>
      <p><strong>City:</strong> {{ location.metafields.custom.city.value | default: "No city" }}</p>
      <p><strong>Phone:</strong> {{ location.metafields.custom.location_phone.value | default: "No phone" }}</p>
      <p><strong>Hours Monday - Saturday:</strong> {{ location.metafields.custom.location_hours_monday_saturday.value | default: "No hours" }}</p>
      <p><strong>Hours Sunday:</strong> {{ location.metafields.custom.location_hours_sunday.value | default: "No hours" }}</p>
    </div>
  {% endfor %}
</div>
You can also get these values in javascript by using the following filter in a script after assigning the variable:
{% assign locations = shop.metaobjects.location_information.values %}
<script>
      console.log('Locations:', {{ locations | json }});
</script>
What if you wanted to take it a step further and only show today's hours on that display? Well now that we can access these values in our liquid and javascript, we can add some logic to test for what day today is and show the appropriate hours. You could create a different entry for hours for every day of the week if hours change, and show those for each store, and again only have to update that data in one place!
Now that you know about creating and using Metaobjects, what kind of Metaobjects are you going to set up for your store?