Multi Store Setup in Magento 2

We will explain how to setup multi stores on Magento 2 with subdomain configuration.
Step 1: Virtual Hosts
We will use one Website. The site will have three Stores. The domain names will share one common base domain. The additional stores will use subdomains. Create three Virtual Hosts for these domains on your web server.
Create magento2.com as the default base domain. Create store2.magento2.com as the 2nd store. Create store3.magento2.com as the 3rd store.
The list of Virtual Hosts should look like this:
Step 2: Root Categories and Test Products
Each store needs a “Root Category”. Create Store2 Root Category and Store3 Root Category in the admin. We create sub categories under each Root Category for this example.
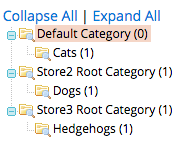
Add one test product to each sub category.

Step 3: Stores and Views
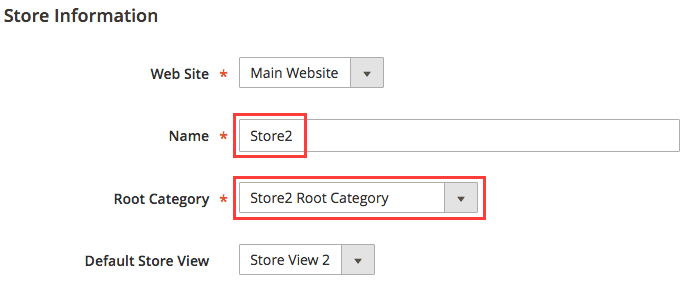
We use the Main Web Store and Default Store View with default configuration. Create Store2 and Store View 2 for 2nd store. Create Store3 and Store View 3 for 3rd store.

For Store2, set Store2 as “Name” and select Store2 Root Category as “Root Category”.
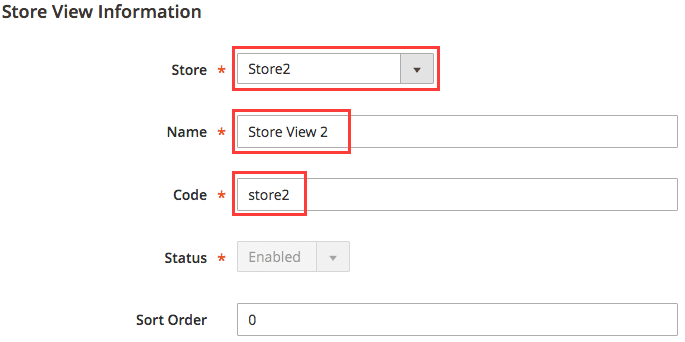
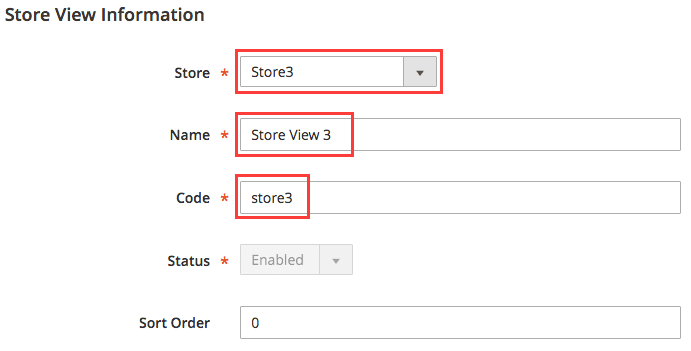
For Store View 2, select Store2 as “Store”, enter Store View 2 as “Name”, and enter store2 as “Store Code”.
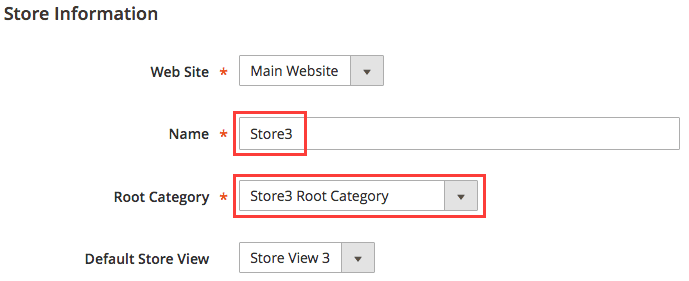
For Store3, set Store3 as “Name” and select Store3 Root Category as “Root Category”.
For Store View 3, select Store3 as “Store”, enter Store View 3 as “Name”, and enter store3 as “Store Code”.
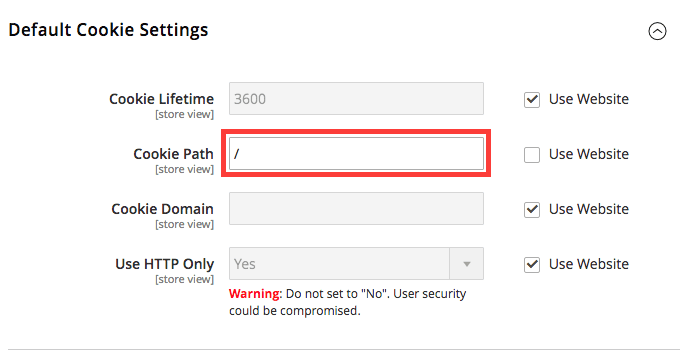
Step 4: URL and Cookie settings
The “Configuration” screen on admin now shows 5 choices under “Store View” drop-down:
“Default Config”
“Main Website”
“Default Store View”
Store View 2
Store View 3
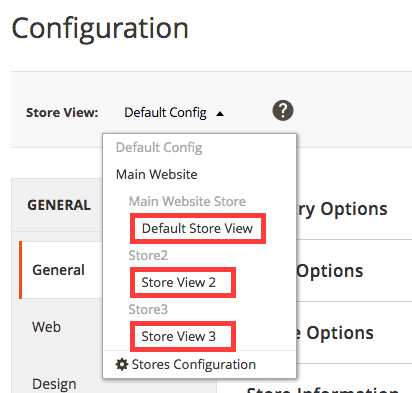
We do NOT change URL and Cookie settings for “Default Config” and “Main Website”. We change URL and Cookie settings for “Default Store View”, Store View 2, and Store View 3.
For “Default Store View”, change “Cookie Path”.
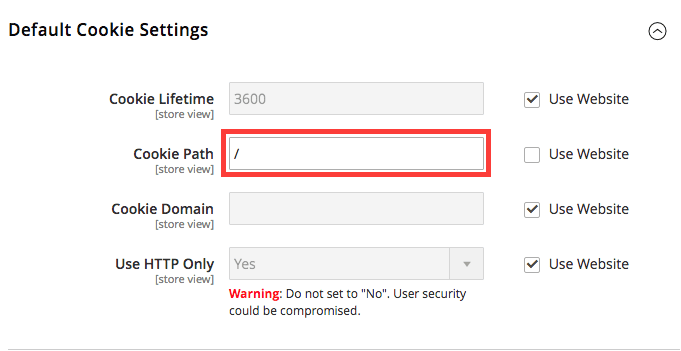
For Store View 2, change “Base URL” and “Cookie Path”.
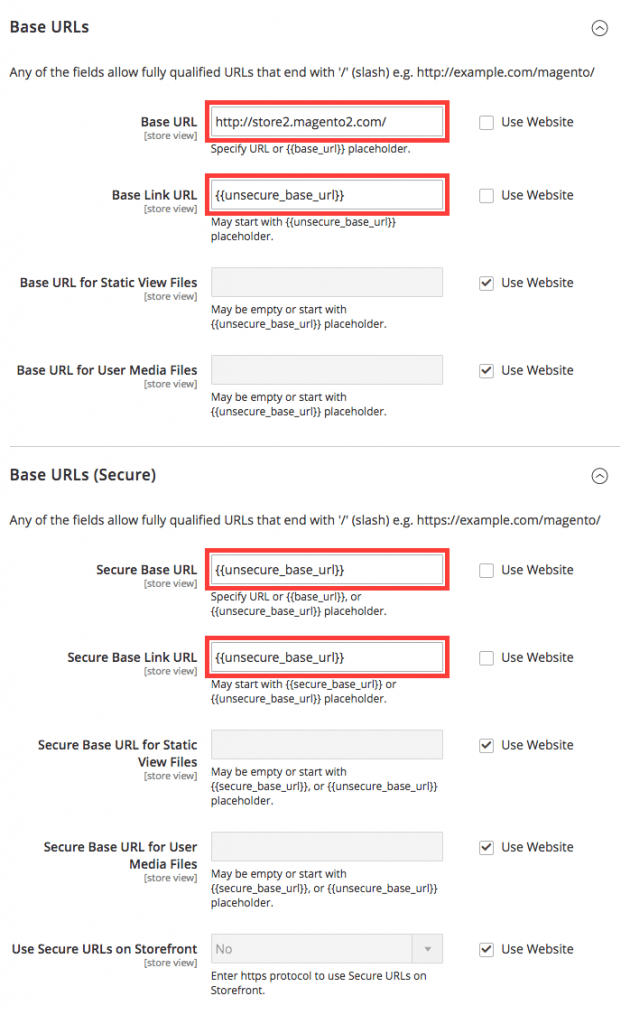
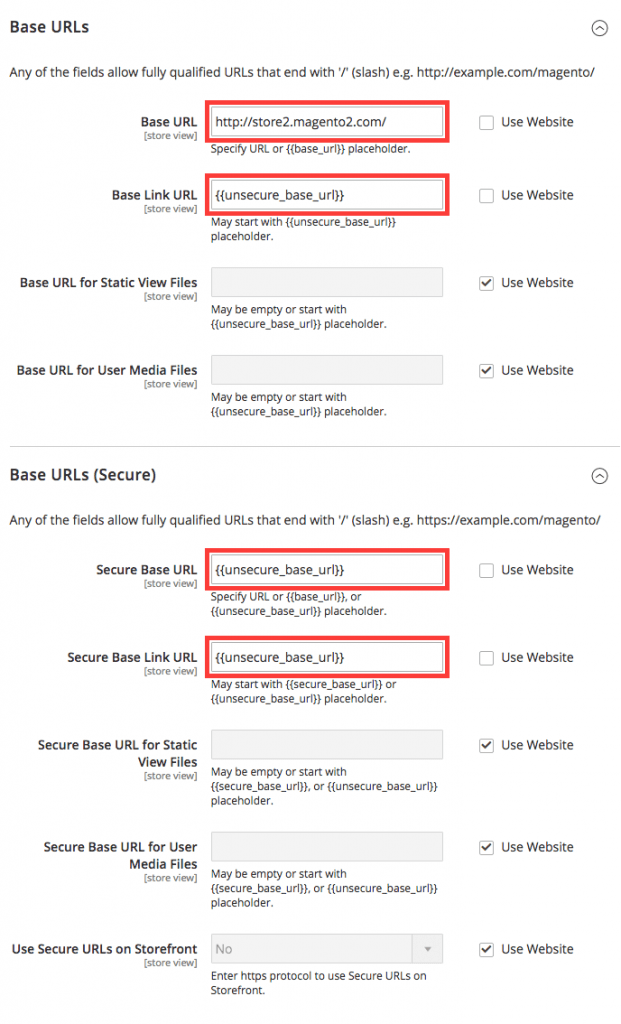
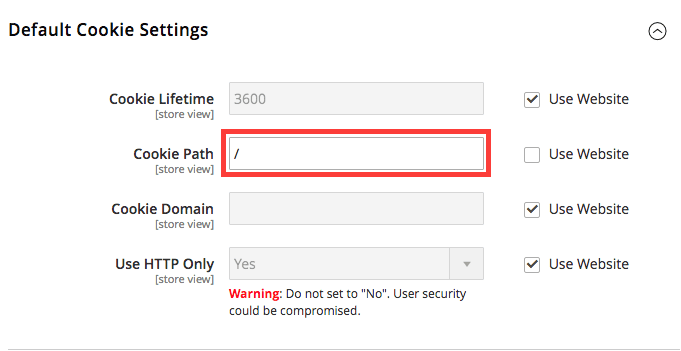
For Store View 3, change “Base URL” and “Cookie Path”.
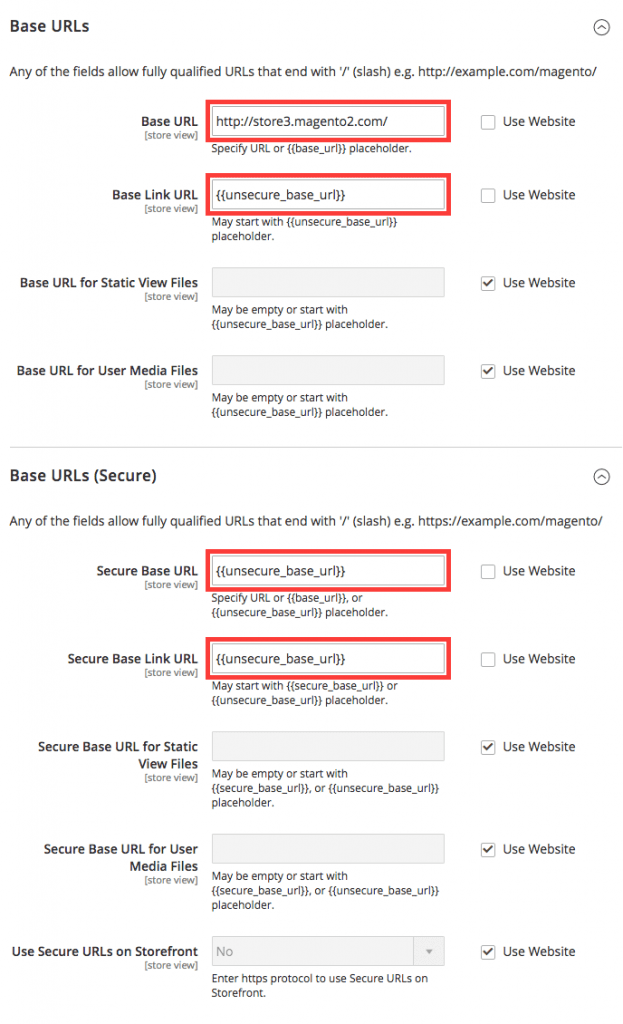
Step 5: Account Sharing
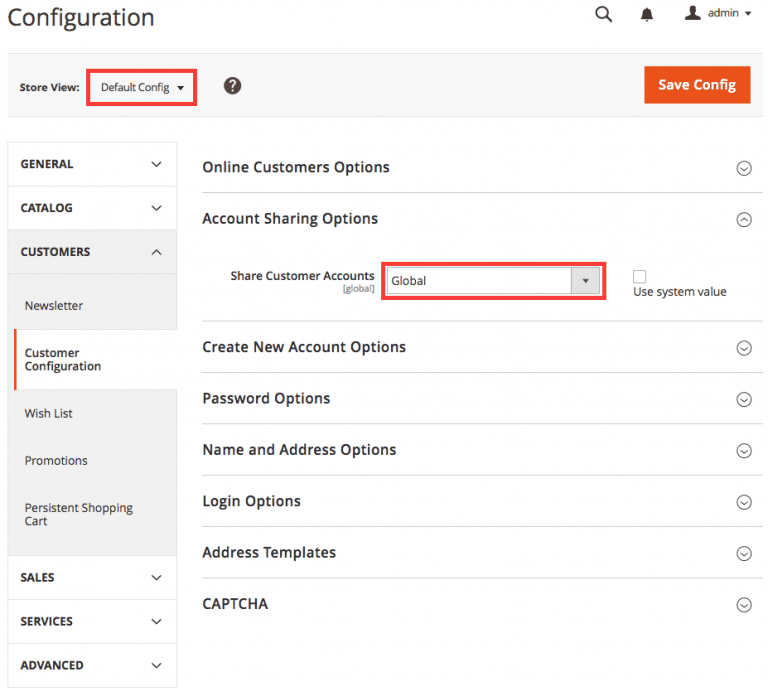
To share user accounts and shopping cart among multiple stores, change “Share Customer Accounts” from “Per Website” to Global under “Default Config”.
STORES => Configuration in Settings section => select “Default Config” => Customer Configuration in CUSTOMERS section => Account Sharing Options => change “Share Customer Accounts” to Global
Step 6: Add Store Code to Urls
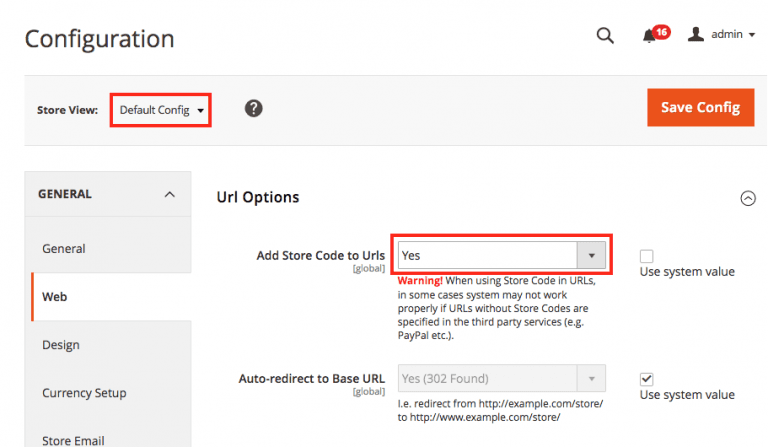
Set “Add Store Code to Urls” to Yes.
STORES => Configuration in Settings section => select “Default Config” => Web in GENERAL section => Url Options => change “Add Store Code to Urls” to Yes
Summary:
To have multiple stores with subdomains on Magento 2, set proper Cookie settings, set Global at “Share Customer Accounts”, and set Yes to “Add Store Code to Urls”.
Note:
This setup was created on this environment:
Magento 2 version 2.1.3
Apache/2.4.27
HP 7.0.21
MariaDB 10.1.25
________________________ Endertech is a Los Angeles Web Developer company providing solutions for your Magento ecommerce web development needs. Contact us for a free consultation.

